Website Chatbot Embed Guide for Any Site
Learn how to embed a chatbot on any website — Shopify, WordPress, Webflow, Squarespace, Wix, or custom HTML — with one JS snippet and per-platform steps.

TL;DR: A website chatbot embed is a JavaScript snippet — typically one <script> tag — that you paste into your site's HTML before the closing </body> tag. Once it's in, a chat widget appears on every page where the script loads. This works on any platform that lets you add custom HTML or JavaScript: Shopify, WordPress, Webflow, Squarespace, Wix, and custom-built sites. This guide covers the universal method, per-platform instructions for each of those six targets, what to configure after the embed, and a launch checklist. It also explains clearly what the embed does and does not do — because the most common confusion is expecting the widget to sync with your product catalog, cart, or order system. It does not. It adds a chat widget.
What "Website Chatbot Embed" Actually Means
A website chatbot embed is the mechanism by which a chatbot widget is placed on a web page. The embed is not a deep integration with your platform — it is a script tag that loads the chatbot's interface as a floating widget in the browser.
When a visitor lands on your site, the browser loads your HTML, encounters the script, fetches the chatbot from the vendor's servers, and renders the widget — typically a bubble in the bottom corner. The visitor can open it, type a message, and the chatbot responds. That conversation happens in the widget; your site's code is not involved after the initial load.
What the embed does:
- Adds a chat widget to every page where the script is present
- Lets visitors start conversations with your AI chatbot
- Captures leads, answers questions, and routes inquiries
- Works across browsers and devices without additional development work
What the embed does NOT do:
- It does not connect to your product catalog, shopping cart, or order history
- It does not read your CMS content automatically
- It does not sync with your CRM natively (handoff happens via REST API and webhooks)
- It does not require your developer to maintain the chatbot logic — that lives on the vendor's servers
This distinction matters because many site owners expect a Shopify embed to mean the chatbot can look up order status or suggest products from their catalog. Those capabilities require additional backend integration work, not the embed snippet itself. The embed adds the widget. Full stop.
For a broader look at what AI chatbots for business are capable of, the AI chatbot for business overview covers the category well.
The Universal Method: One Snippet, Any Site
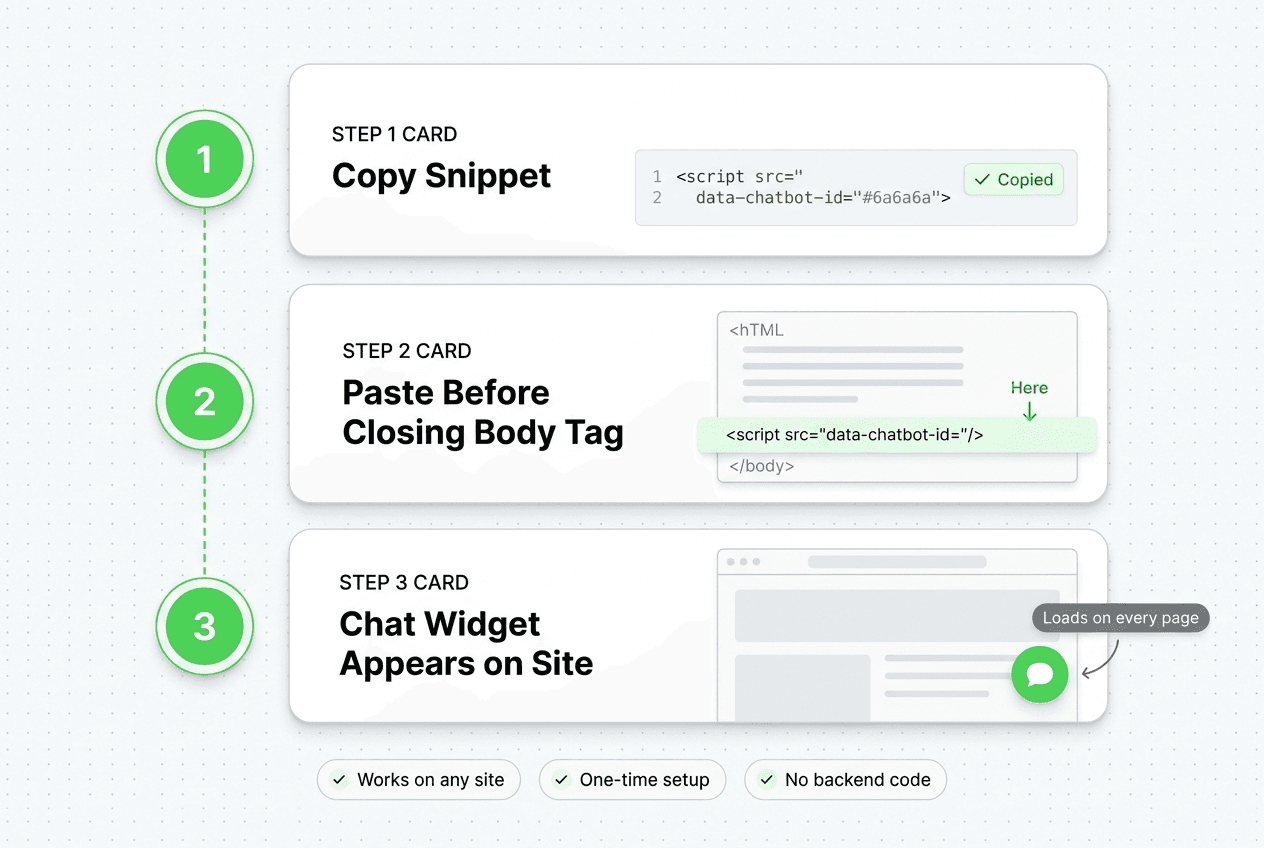
Every website chatbot embed follows the same pattern, regardless of the platform you use to build your site.
Step 1: Get your embed snippet.
After setting up your chatbot in the platform's dashboard, you will find an embed code section — sometimes called "Install Code", "Embed Widget", or "Website Integration". The snippet looks like this:
<script
  src="https://cdn.example.com/chatbot.js"
  data-chatbot-id="YOUR_ID"
  async
></script>
The data-chatbot-id attribute (or equivalent parameter) identifies your specific chatbot configuration. Every site visitor who triggers this script loads your chatbot, not a generic one.
Step 2: Paste the snippet before </body>.
Open your site's HTML template or the platform's custom code section. Find the closing </body> tag. Paste the snippet immediately before it. Placing the script at the bottom of the body ensures it loads after the main page content, so it does not delay your page's visible render.
Step 3: Publish or save.
Depending on your platform, you save the template, publish the change, or push the file. The widget will appear on every page that uses that template — which, for most sites, means every page.
That is the complete universal method. The per-platform instructions below are variations of exactly these three steps, adapted for how each platform handles custom code.
Per-Platform Embed Steps
Custom HTML Site
If you manage your own HTML files, this is the most direct path.
- Open the HTML file for your site. If you use a shared layout or base template (
layout.html,base.html,default.html, or similar), edit that file so the script loads on every page. - Locate the closing
</body>tag. - Paste your chatbot script tag immediately before it.
- Save the file and deploy it to your server or hosting provider.
If your site generates HTML from a static site generator (Jekyll, Hugo, Eleventy, Astro), edit the base layout template in the generator's theme directory. The output HTML will include the script on every generated page. For a step-by-step walkthrough, see the dedicated guide on how to add an AI chatbot to any HTML website.
WordPress
WordPress gives you two main paths: editing the theme template directly, or using a plugin that manages header and footer code without touching theme files.
Path A — Theme editor (for simple setups):
- In the WordPress dashboard, go to Appearance → Theme File Editor.
- Open
footer.phpin the right-side file list. - Locate the
<?php wp_footer(); ?>line near the bottom, which renders just before</body>. - Paste your chatbot script tag immediately after that line, before the closing
</body>tag. - Click Update File.
Path B — Header Footer Code Manager plugin (recommended for non-developers):
- Install and activate a header/footer code plugin (e.g., "Insert Headers and Footers" by WPBeginner or "Header Footer Code Manager").
- Open the plugin settings and find the Footer section.
- Paste your chatbot script tag in the footer field.
- Save. The plugin injects the script into every page without modifying theme files directly — which means theme updates do not wipe your embed code.
Shopify
Shopify embeds go into theme.liquid, the base template that wraps every storefront page.
- In Shopify Admin, go to Online Store → Themes.
- Next to your active theme, click Actions → Edit code.
- In the left sidebar under Layout, open
theme.liquid. - Find the closing
</body>tag near the bottom of the file. - Paste your chatbot script tag immediately before it.
- Click Save.
The widget will appear on all storefront pages — product pages, collection pages, cart, checkout (subject to Shopify's checkout restrictions), and your homepage.
Important: The embed adds the chat widget to your Shopify storefront. It does not integrate with Shopify's product catalog, inventory, order management, or customer data. If a visitor asks "where is my order?" the chatbot cannot look that up from the embed alone — it can only answer from the knowledge base you have configured in the chatbot platform.
Webflow
Webflow has two places where you can add custom code: project-level (loads on every page) and page-level (loads only on a specific page).
Project-level embed (recommended for site-wide chat):
- In the Webflow Designer, go to Project Settings → Custom Code.
- Scroll to the Footer Code section.
- Paste your chatbot script tag into the footer code field.
- Click Save Changes, then publish your site.
Page-level embed (for a single page only):
- Select the page in the Webflow Designer Pages panel.
- Open Page Settings → Custom Code → Before
</body>tag. - Paste your script tag there.
- Publish the page.
Note: Custom code requires a Webflow paid site plan. The free Webflow tier does not allow custom code injection. The full Webflow chatbot guide covers both embed paths step by step.
Squarespace
Squarespace routes all sitewide custom code through Code Injection.
- In the Squarespace editor, go to Settings → Advanced → Code Injection.
- Scroll to the Footer field.
- Paste your chatbot script tag into the footer field.
- Click Save.
The script will load on every page of your Squarespace site. Code Injection requires a Squarespace Business plan or higher — Personal plans do not include this feature. For a deeper walkthrough with screenshots, plan requirements, and page-specific placement options, see the dedicated chatbot for Squarespace guide.
Wix
Wix provides two embed paths: the Custom Code manager (recommended) and the HTML embed widget.
Custom Code manager (recommended for site-wide embed):
- In the Wix dashboard, go to Settings → Custom Code.
- Click + Add Custom Code.
- Paste your chatbot script tag.
- Set Add Code to Pages to "All Pages".
- Set Place Code in to "Body - end".
- Click Apply.
The Wix Custom Code manager is available on paid Wix plans (Core and above). The embed will load on all pages automatically. See the dedicated chatbot on Wix guide for the full setup.
HTML Embed widget (alternative for single-page placement):
- In the Wix Editor, click Add (+) → Embed → Custom Embeds → Embed HTML.
- Drag the HTML widget to the position where you want the chatbot to appear.
- In the widget settings, paste your script tag.
Note: The HTML Embed widget approach only places the widget on that specific page. Use the Custom Code manager for site-wide coverage.
Configuration After Embed
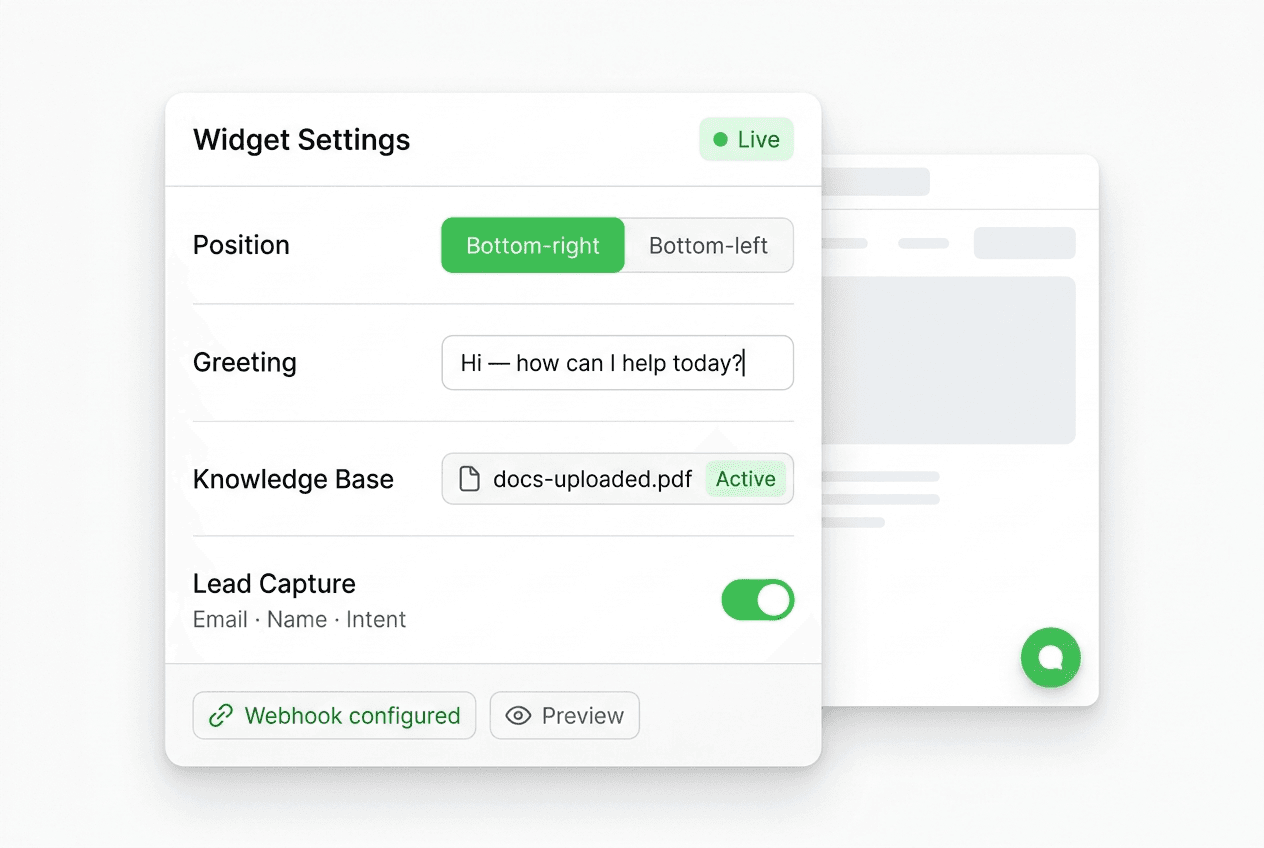
Once the script is live on your site and the widget is appearing, three configuration steps determine how useful it actually is.
Widget Position
Most chatbot platforms let you set the widget position to bottom-right (the default and most common) or bottom-left. Some platforms also allow horizontal offset so the widget does not overlap a live chat bubble or a cookie consent banner. Set this in your chatbot platform's appearance settings — the position is controlled by the chatbot's configuration, not by where in the HTML you paste the script.
Opening Greeting
The first message a visitor sees when the widget opens should do two things: acknowledge that the visitor has arrived, and show them what the chatbot can help with. A generic "Hello! How can I help?" is forgettable. A specific greeting that names your business type and a concrete use case converts better:
"Hi — I can help with pricing questions, tell you about our plans, or connect you with the team. What brings you here today?"
Keep it under two lines. If you offer button options (common in chatbot platforms), limit them to three or four choices that represent your most common visitor intents.
Knowledge Base
The embed loads the widget. What the chatbot actually says depends on the knowledge base you connect. Upload your product or service documentation, pricing pages, FAQ content, and any common objection-handling material. The more specific the knowledge base, the more accurate and useful the chatbot's answers will be.
Document-grounded responses mean the chatbot answers from what you have told it, rather than from general training data. When it does not have an answer, it should route the visitor to a human — not guess. Verify that your chatbot is configured to escalate when knowledge runs out.
For implementation guidance beyond the embed, the AI chatbot implementation checklist for SMBs walks through the full setup process from configuration to launch.
Lead Capture
If capturing visitor contact information is a goal — and for most business sites, it is — configure the lead capture flow in your chatbot platform before going live. This typically means:
- Defining when to ask for contact details (after the visitor has expressed intent, not as the first message)
- Setting which fields to capture (email is the minimum; phone optional)
- Configuring the webhook or API destination where captured leads are delivered
- Setting up a confirmation message so visitors know their information was received
Lead capture is a chatbot configuration question, not an embed question. The embed just loads the widget. How the widget behaves is defined in the chatbot platform.
Testing and Launch Checklist
Before treating the embed as live, run through this checklist:
| Check | What to verify |
|---|---|
| Widget loads on desktop | Open your site in a desktop browser. The chat bubble should appear in the corner. |
| Widget loads on mobile | Open your site on a phone or use browser dev tools to simulate a mobile viewport. The widget should render without overlapping critical content. |
| Widget loads on all page types | Check your homepage, a product or service page, a blog post, and your contact page. If the script is in the base template, it should load everywhere. |
| Opening greeting appears | Click the chat bubble. Confirm the opening greeting is correct — the right name, the right offer. |
| Knowledge base is connected | Ask the chatbot a question you know the answer to from your uploaded documents. Verify it answers correctly. |
| Escalation works | Ask a question the chatbot does not have an answer for. Verify it escalates to a human or collects contact details rather than hallucinating an answer. |
| Lead capture fires | Submit test lead data. Verify the lead appears in your chatbot platform dashboard. Verify the webhook payload reaches your configured destination. |
| No page speed impact | Run a Lighthouse or PageSpeed Insights test with and without the script. The async attribute on the script tag ensures it loads without blocking the main thread. If you see a significant impact, verify the script tag is using async or defer. |
| Chatbot ID is correct | Confirm the data-chatbot-id (or equivalent) in the snippet matches your chatbot configuration in the platform. A wrong ID loads a blank or default chatbot — or nothing at all. |
If any check fails, the most common causes are: the script is not in the correct template file, the chatbot ID is wrong, or the platform plan does not support custom code injection (Webflow free tier, Squarespace Personal, Wix free plan).
What the Embed Does Not Cover: Multi-Channel
A website chatbot embed covers your web traffic. It does not cover visitors who arrive through Instagram ads, people who message your Facebook page, or customers who prefer to communicate on WhatsApp.
The four channels where customer conversations happen today are: Website, WhatsApp Business API, Instagram DM, and Facebook Messenger. Each requires a separate connection — WhatsApp needs Business API access, Instagram DM and Facebook Messenger connect through Meta's business integration. None of those connections are managed through the website embed snippet.
The operational value of connecting all four is that your team manages one lead queue instead of four separate inboxes. When a prospect starts on your website and follows up on WhatsApp, both conversations are in context.
For a practical strategy on deploying across all four channels, multi-channel AI chatbot strategy covers the full deployment approach. The channels page shows how Hyperleap handles each connection.
Hyperleap Fit: Embed on Any Site, Configure Once
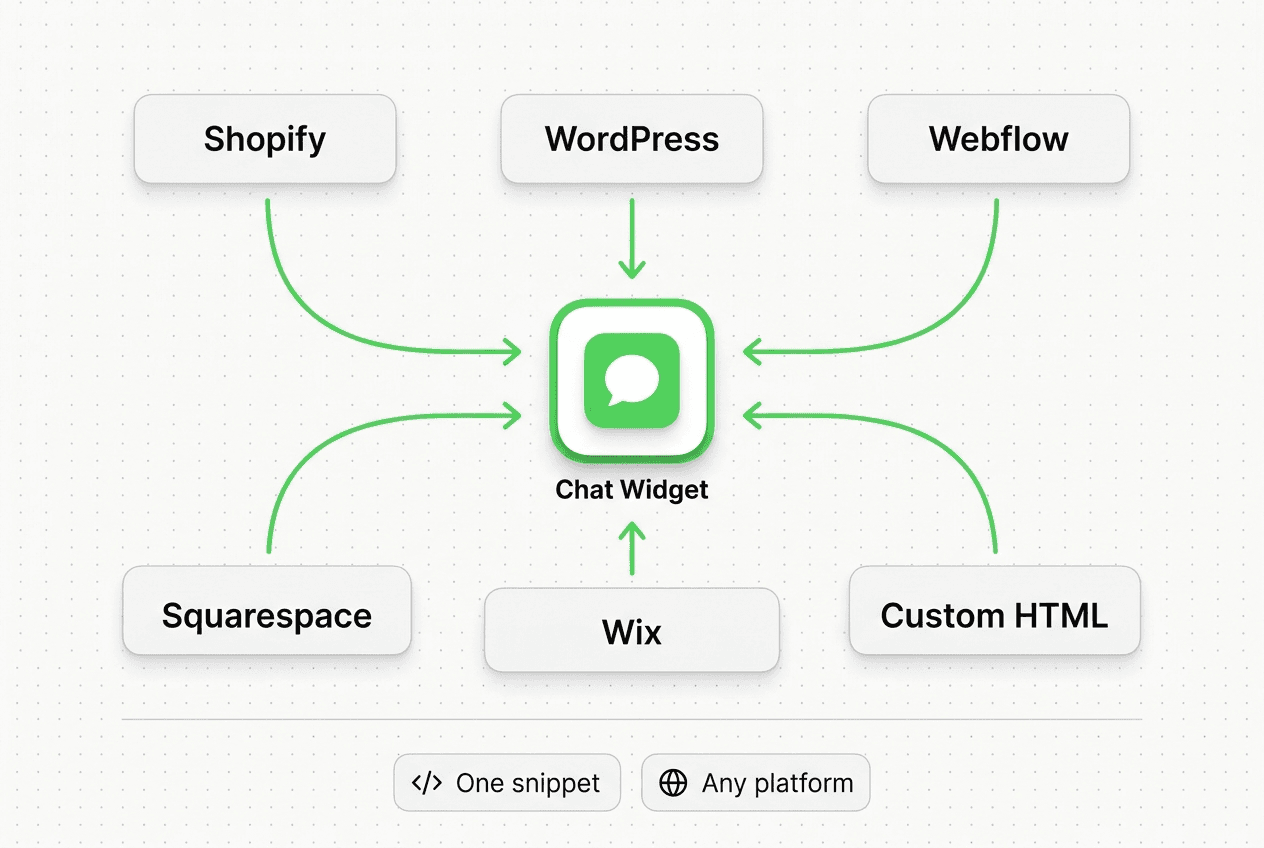
Hyperleap AI is an AI chatbot platform that embeds on any website that accepts custom HTML or JavaScript. The embed snippet follows the universal method described in this guide — one script tag before the closing body tag. Per-platform setup for Shopify, WordPress, Webflow, Squarespace, Wix, and custom HTML all work through the same snippet from your Hyperleap Studio dashboard.
After the embed:
- Knowledge base: upload your product documentation, pricing, FAQs, and any content the chatbot should draw on for answers
- Lead capture: configure which fields to collect and where to deliver them — REST API and webhooks connect to your CRM or internal tooling
- Widget configuration: set position, greeting, and conversation flow from the dashboard
- Multi-channel expansion: add WhatsApp Business API, Instagram DM, and Facebook Messenger from the same configuration — the same chatbot logic runs across all four channels
Hyperleap's handoff uses REST API and webhooks, not native CRM plug-ins. This gives you full control over the payload shape and destination without version dependencies on a specific CRM.
See the full product features page for the current capability set, and the MCP page if your team uses AI clients to query lead and conversation data.
Pricing
All plans include a 7-day free trial with a credit card required. There is no free plan.
| Plan | Price | AI Responses / mo | Chatbots |
|---|---|---|---|
| Plus | $40/mo | 3,000 | 1 |
| Pro | $100/mo | 12,000 | 2 |
| Max | $200/mo | 30,000 | 5 |
Full plan details are on the pricing page.
FAQ
What is a website chatbot embed?
A website chatbot embed is a JavaScript snippet — typically a single <script> tag — that you add to your site's HTML. When a visitor loads the page, the script loads the chatbot widget. The widget appears as a floating button or panel, usually in the corner of the screen. Clicking it opens the chat interface. No backend development is required to embed the widget; you paste the script tag once into your site's template and it loads on every page that uses that template.
Does a website chatbot embed work on any website builder?
Yes, provided the platform allows custom HTML or JavaScript injection. Shopify, WordPress, Webflow (paid plans), Squarespace (Business plan and above), and Wix (paid plans) all support it. Custom HTML sites always support it. The only limitation is platforms that prohibit custom code entirely — some free-tier website builder plans fall into this category.
Does the embed connect the chatbot to my product catalog or cart?
No. The embed adds the chat widget. It does not integrate with your platform's product database, shopping cart, inventory system, or order management. If you need the chatbot to answer questions about specific products or order status, you would need to add that information to the chatbot's knowledge base manually, or build a backend integration using the chatbot platform's REST API.
Where exactly do I paste the chatbot script tag?
Paste it immediately before the closing </body> tag in your site's base template or layout file. For platform-specific locations: Shopify uses theme.liquid, WordPress uses footer.php or a header/footer plugin, Webflow uses Project Settings → Custom Code → Footer Code, Squarespace uses Settings → Advanced → Code Injection → Footer, and Wix uses Settings → Custom Code → Body End.
Does the embed slow down my website?
A correctly implemented embed uses the async attribute on the script tag, which means the script loads in parallel with the rest of the page and does not block rendering. The initial page content loads and displays before the chatbot script finishes loading. If you notice a speed impact, verify the script tag includes async and that it is placed at the bottom of the body rather than in the <head>.
Can I embed the chatbot on only one page, not the whole site?
Yes. For a site-wide embed, add the script to your base template or layout file. For a single-page embed, add the script only to that specific page's template or custom code section. Most platforms that support per-page custom code (Webflow page settings, Wix HTML embed widget) allow this.
What channels does the chatbot embed cover?
The website embed covers visitors arriving on your website. It does not cover WhatsApp, Instagram DM, or Facebook Messenger conversations. Each of those channels requires a separate connection through the chatbot platform. A well-deployed AI chatbot typically runs across all four channels — Website, WhatsApp, Instagram DM, and Facebook Messenger — with the same knowledge base and conversation logic, so your team manages one unified lead queue instead of channel-specific inboxes.
Ready to Embed?
The technical part of embedding a chatbot is a single script tag. What makes it useful is what you configure after the embed: a relevant knowledge base, a well-crafted opening greeting, and a clear lead capture flow.
Next steps:
- Start your 7-day free trial — get your embed snippet, configure your chatbot, and go live on your site
- See the full feature set — knowledge base, lead capture, REST API, webhooks, and four-channel deployment
- Review pricing — Plus at $40/mo, Pro at $100/mo, Max at $200/mo
- Explore multi-channel deployment — add WhatsApp, Instagram DM, and Facebook Messenger to the same chatbot If your site is plain HTML with no CMS at all, see the dedicated HTML chatbot embed guide for the platform-specific walkthrough.
Related Articles

How to Add an AI Chatbot to Webflow (Step-by-Step)
Add an AI chatbot to Webflow with one script tag — Custom Code placement, plan requirements, the publish gotcha, and troubleshooting, explained step by step.

Add an AI Chatbot to WordPress (No Plugin Bloat)
How to add an AI chatbot to WordPress with a lightweight script embed — where to paste it, page-builder specifics, and how to avoid plugin bloat.
How to Add an AI Chatbot to Squarespace (Step by Step)
Step-by-step guide to adding an AI chatbot to Squarespace via Code Injection, plus plan requirements, troubleshooting, and a pre-launch checklist.

Chatbot Lead Summaries: What Your Team Should Receive After Every Conversation
A raw transcript creates work. A chatbot lead summary — contact details, intent, qualification signals, timeline, and a next action — means your rep is ready to call in 30 seconds.