Publishing Your Chatbot
Click Publish
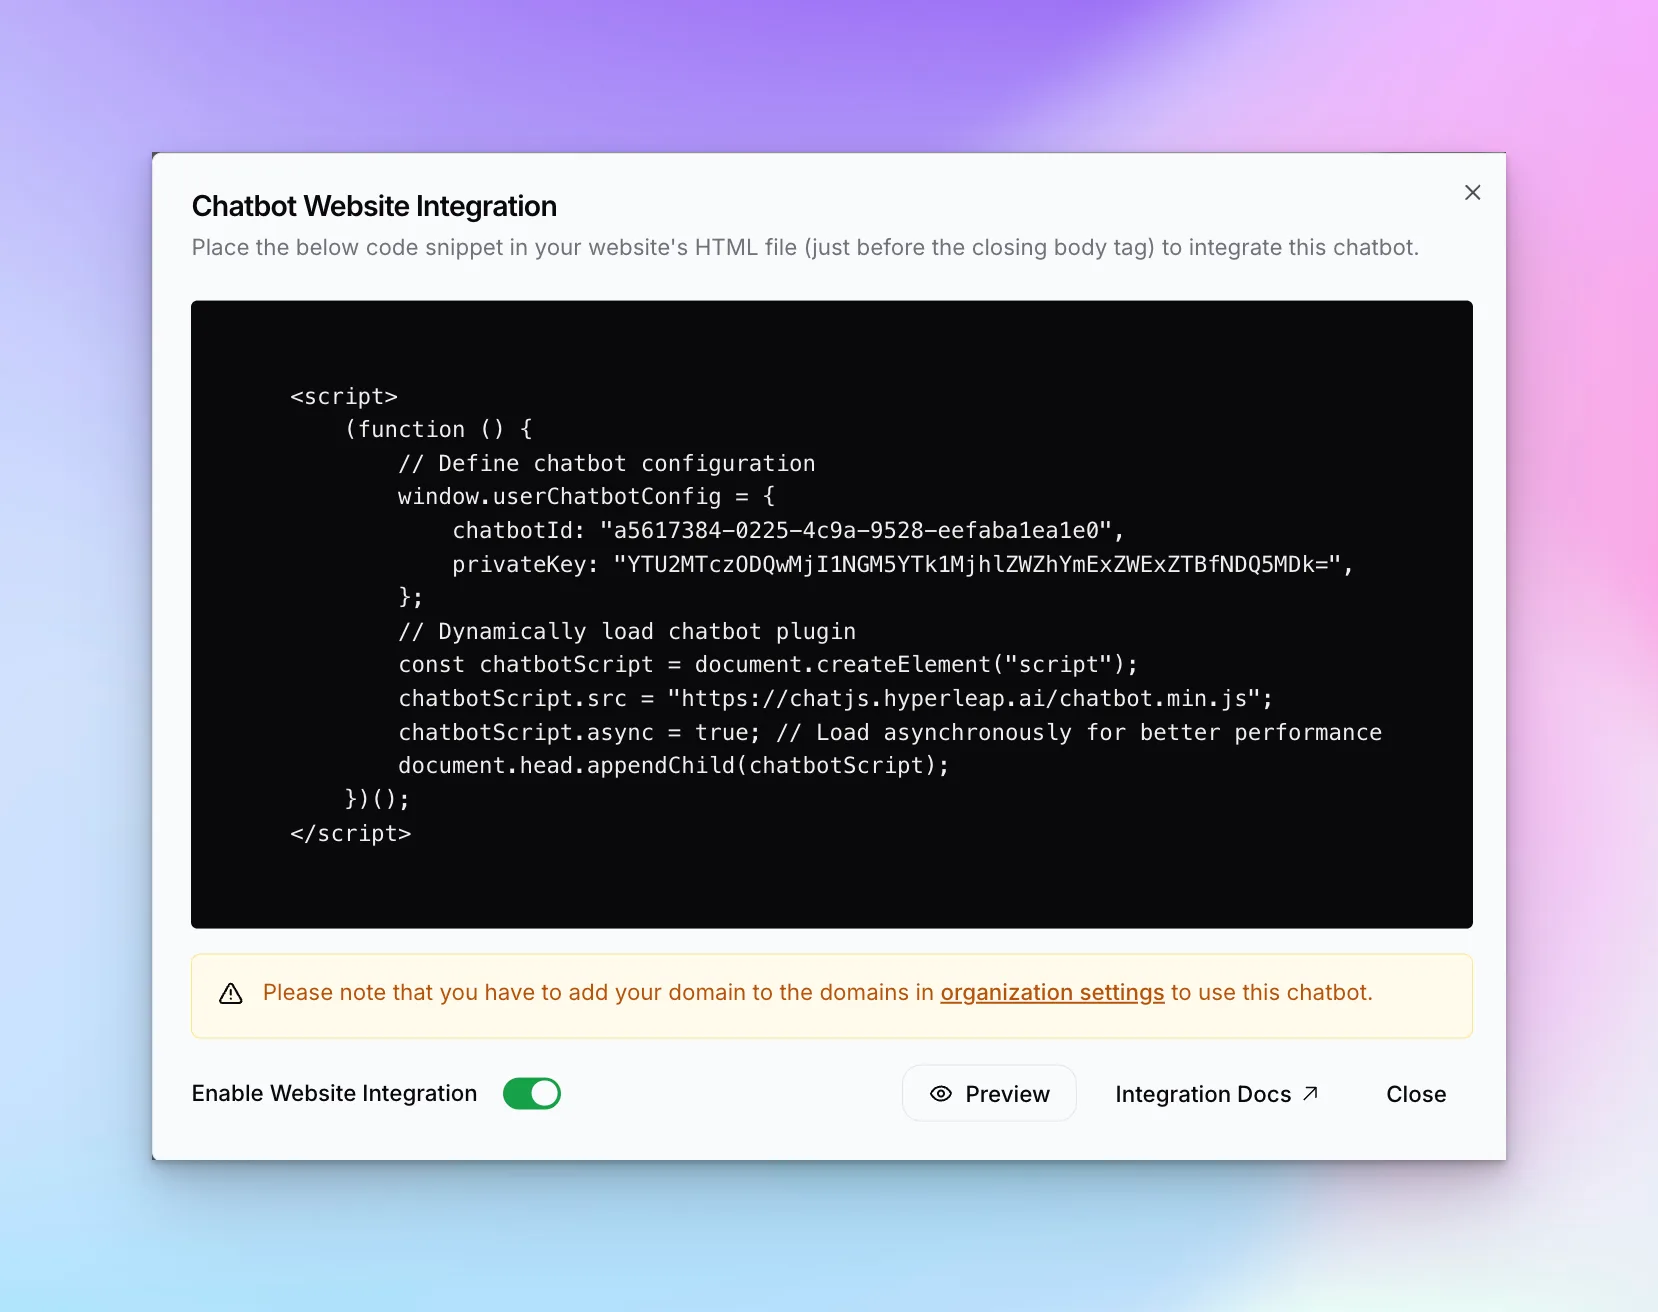
In the chatbot editor, click the "Publish" button in the header. This opens the Website Integration dialog.
Enable Website Integration
Toggle "Enable Website Integration" to activate the embed code.
Add Your Domain
Add your website domain to the allowed domains list in organization settings. This is a security measure to prevent unauthorized embedding.
Copy the Embed Code
Copy the JavaScript snippet provided in the integration dialog.
The Embed Code
The embed code looks like this:
<script>
(function () {
  // Define chatbot configuration
  window.userChatbotConfig = {
    chatbotId: "a5617384-0225-4c5a-9528-eefab4leald8",
    privateKey: "YTU2MTc...",
  };
  // Dynamically load chatbot plugin
  var chatbotScript = document.createElement("script");
  chatbotScript.src = "https://chatjs.hyperleap.ai/chatbot.min.js";
  chatbotScript.async = true; // Load asynchronously for better performance
  document.head.appendChild(chatbotScript);
})();
</script>
Installing on Your Website
Paste the embed code just before the closing </body> tag of your website. The exact method depends on your website platform:
WordPress
Via Theme Editor or Headers & Footers plugin
Shopify
Edit theme.liquid in Layout folder
Webflow
Project Settings → Custom Code
Wix
Settings → Custom Code → Body end
Squarespace
Settings → Code Injection → Footer
Custom HTML
Paste before </body> tag
WordPress
- Go to Appearance → Theme Editor (or use a plugin like "Insert Headers and Footers")
- Find your theme's
footer.phpfile - Paste the code before
</body> - Save changes
Shopify
- Go to Online Store → Themes → Edit Code
- Find
theme.liquidin the Layout folder - Paste the code before
</body> - Save
Webflow
- Go to Project Settings → Custom Code
- Paste in the Footer Code section
- Publish your site
Wix
- Go to Settings → Custom Code
- Click "Add Custom Code"
- Paste the code, select "Body — end" placement
- Apply to "All pages"
- Save
Squarespace
- Go to Settings → Advanced → Code Injection
- Paste in the Footer section
- Save
Custom HTML
Simply paste the code before </body> in your HTML file(s).
Domain Whitelist
For security, your chatbot only works on whitelisted domains. You must add your domain before the embed code will work. See the Whitelisting Domains guide for step-by-step instructions.
Preview vs. Production
- Preview — Click "Preview" in the integration dialog to test on a temporary URL
- Integration Docs — Click for detailed platform-specific guides